


10 Tips for Better Holiday Photos
These are 10 tips that anyone can use to take better pictures on holiday. We'd like to acknowledge the inspiration of our friend, John Warburton-Lee, who is an outstanding photographer as you'll see on his website.
The photos are all taken by us and show just some of our handmade holidays in Spain & Latin America. If you like what you read, please spread the word.
The rule of thirds
Imagine dividing the image into three equal columns and three equal rows to make a 3x3 grid.
Instead of placing your subject dead-centre, put it at one of the intersections.
You'll see this image of Christ the Redeemer in Rio quite neatly illustrates the point.
Which intersection to use depends on the subject, the background and what's going on of course.
If you're not sure, try all four in your viewfinder and see which one works best.
Try it. Position your subject right in the middle of the frame then take other pictures with the subject at those intersections.
You should see a remarkable difference.
These three photos of Boipeba island in Brazil's Bahia region are cropped differently to show you the effect.
The first image is half beach and half sky. It's not really clear what we're meant to look at here. Though obviously a fairly pretty place, the overall effect is underwhelming, slightly dull.
The next one is 2:1 in favour of the sky and is more obvious for our eye to 'read' and a little more pleasing. The third one is 2:1 in favour of the beach and is obviously about the wide open pristine beach.
Movement to the middle
With a moving subject, position it so that it's moving into (or out of) the middle of your picture.
Place it using the Rule of Thirds and so that it's moving towards the middle. This suggests the movement much better than having the subject bang in the middle since viewers' eyes will anticipate the subject's movement.
In this photo of walkers approaching Glacier Grey in "Chile's":/holidays/chile-holidays Torres del Paine National Park, our eye is drawn from the left, along the line of walkers to the centre of the picture and where they are walking towards.
What's your story?
A good photo tells a story.
What's yours about?
Once you know, you should know what your subject is, how you want to lead viewers' eyes to it, what context to give it, etc.
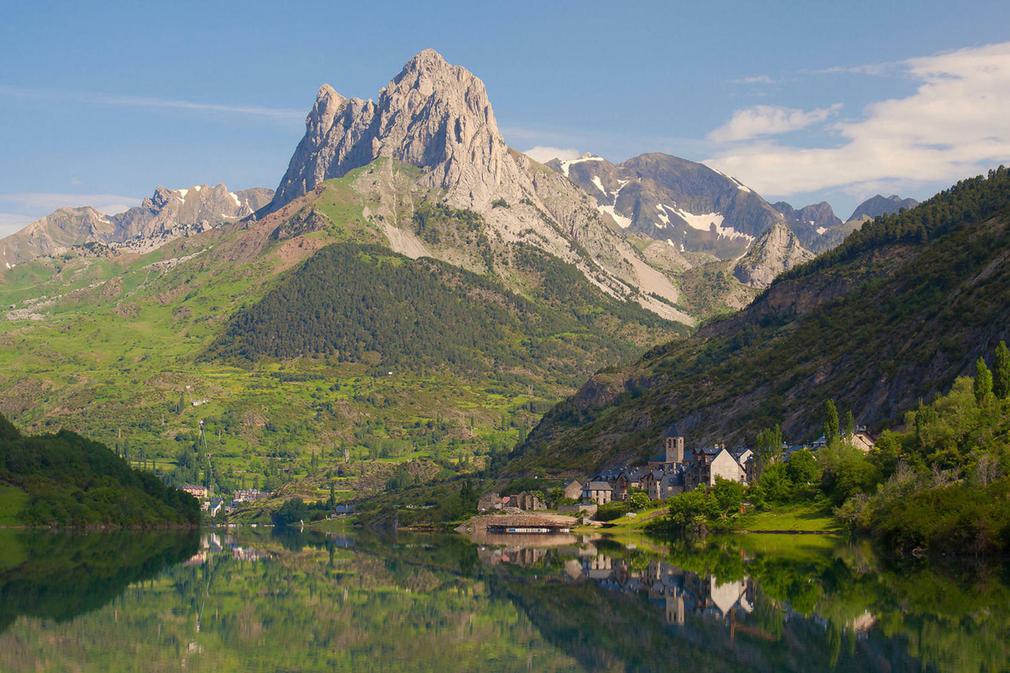
In the top picture, we use our subject (the person) to illustrate our story which is about the scale and rugged beauty of the Picos de Europa mountains in summer.
In this case our picture is all about the context and the subject places (and scales) us in it.
Landscapes are very hard to do well: a really pretty view is rarely sufficient. Give the scene a subject (as in the picture above) and it'll be a lot more appealing.
If your subject is nearby, don't have them facing the camera, especially if they're grinning. Have them face the scene and position them to one side, so that your picture shows them and what they're looking at.
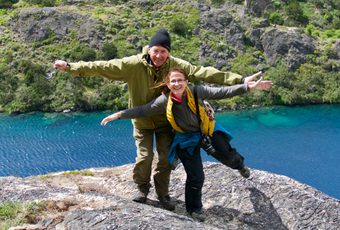
In the lower picture, we only need enough context (the snow) to place our happy young subject on a ski piste, in this case Cerler in the Spanish Pyrenees.
The picture is obviously all about his happiness.
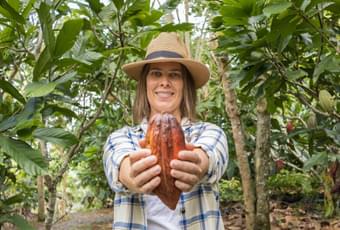
Focus just on your subject
Remove all extraneous objects. A photo of a market is a tricky thing to get right, largely because there are so many things going on simultaneously. In this photo, taken by Linda Biggers in Logrono's Abastos market in Spain's Rioja region, she's focused in on the rich red colours of the jamon, peppers, sausages, etc.
Instead of trying to take a general shot of the market, she has picked a corner to shoot. The handwritten labels tell us it's a market, probably in Spain, so the photo can focus on the food and make us wish we were there.
Get rid of clutter
Move things if you have to. Pick up litter.
Move yourself to get a clear shot. Move closer. Try a different angle to get better light or avoid distractions in the background.
Whatever it takes, make your subject stand out.
The next two tips are also about reducing clutter and distraction from your subject.
Blur the background
One of the best ways to remove distractions from photos of people or other nearby subjects is to have them in focus and the background blurred out of focus.
Imagine you want to take a picture of a person standing in a busy marketplace. If everything's in focus, then it'll be really hard to work out what the picture's about, since everything will be clear. If only the subject is in focus but all around is blurred, then it'll be much easier to understand the picture.
If you have an aperture control on your camera (most do but you'll have to enter the scary world of Manual controls), then open the aperture as wide as possible choosing the lowest possible f-number.
That'll probably be something like f4.2 or f2.8 or lower if you're lucky. Perversely the lower the number the wider the aperture.
This weaver on Taquile island in Peru is a gift for a wide aperture photo. As is the image below of a meal at La Venta de Moncalvillo in La Rioja. Notice how the clutter of the table is a blur.
The wider the aperture the shorter the range of distances from you that'll be in focus (known as the _depth of field_) so you have a better chance of getting your subject in sharp focus and the background that you're not interested in to be blurred.
If that sounds too scary (or your camera really doesn't want to play ball) then you can achieve much the same effect by getting as close as you can to your subject.
Don't use the zoom for this: you need to be close and the zoom as far out as it'll go.
Move yourself
Not everything interesting happens at eye level. Move around: crouch down, lie down, climb up on things to vary your viewpoint. The most mundane things can become quite intriguing from the right angle.
I love this photo of a penguin taken by Pura's Sarah Wightman in March 2009 in Antarctica. It's not often you see the top of their heads!
This photo of drummers in the Brazilian city of Salvador is taken side-on at drum height to accentuate the movement of the drumsticks.
Varying your position also means that you can get greater contrast in your photos.
So many photos that we see of the wildlife in the Galapagos Islands are quite dull. Since the islands are basically formed of lava if you take a photo of a marine iguana from eye height, you'll have a photo of a black lizard against a black background.
Get down low, however, and you can often find a much more interesting background (sea or sky) to give you contrast or you can lose the grey background out of focus as we have here.
Portrait isn't just for portraits
Don't forget to turn your camera round.
There are many photos which will work really well portrait orientation (tall and narrow) but look rubbish landscape (wide and short).
If you apply the rule of thirds to your pictures then usually there will be a natural choice as to whether to compose portrait or landscape.
If in doubt, however, take both and delete the ones that don't work later.
This picture was taken on one of our Pyrenees Family Adventure holidays.
Use light wisely
We all know that taking a picture with the light behind the subject is probably just going to wreath the subject's face in shadows, making a terrible picture.
Doing the opposite is just as bad. Light striking the subject front-on risks three things: the subject will be harsh, washed out, with little contrast the subject will probably be squinting, and you may well have your own shadow in the picture.
Light coming from either side (in front or behind) will usually produce the most pleasing contrasts, shadows and colours.
That's why the prettiest light is usually during the first and last hours of sunlight when the sun is low in the sky. If you can take pictures at these times, then you'll be working with the best light of the day.
The lower photo of the Picos mountains by Pura's Katie Edwards shows that you don't need bright sunshine to take a wonderful photo. The light is dramatic and that's what matters.
Change the card every day
Having gone to the effort of taking all of those lovely photos, you don't want to lose them. So...
Take lots of memory cards with you.
Swap the card in the camera each day so that if you lose your camera, you will only lose the pictures from that day.
Keep the used cards somewhere safe.
Lower capacity memory cards are much cheaper than the highest capacity ones, and usually have plenty of room for a day's photos.
At the time of writing, you can buy 2GB SD memory cards for around 2 pounds while a single 16GB version will cost around 32 pounds. Since a 2GB card will typically hold several hundred photos, it doesn't make much sense to spend a lot on one or two high capacity cards that put all of your eggs in one basket.
Just don't wait until the airport to stock up on spare cards: even duty free the high street retailers can be 10 times as expensive (literally - I've just checked - it's outrageous) as buying online.
We hope that our Top 10 Tips are useful and help you take even better photos.
If you have any suggestions for things we should add or change, or just want to comment, please contact us here.
Get in touch Subscribe to The Pothole
The Pothole is Pura Aventura's popular monthly email. We share what we love, what interests us and what we find challenging. And we don't Photoshop out the bits everyone else does. We like to think our considered opinions provide food for thought, and will sometimes put a smile on your face. They've even been known to make people cry. You can click here to subscribe and, naturally, unsubscribe at any time.
The Pothole is Pura Aventura's popular monthly email. We share what we love, what interests us and what we find challenging. And we don't Photoshop out the bits everyone else does. We like to think our considered opinions provide food for thought, and will sometimes put a smile on your face. They've even been known to make people cry. You can click here to subscribe and, naturally, unsubscribe at any time.

